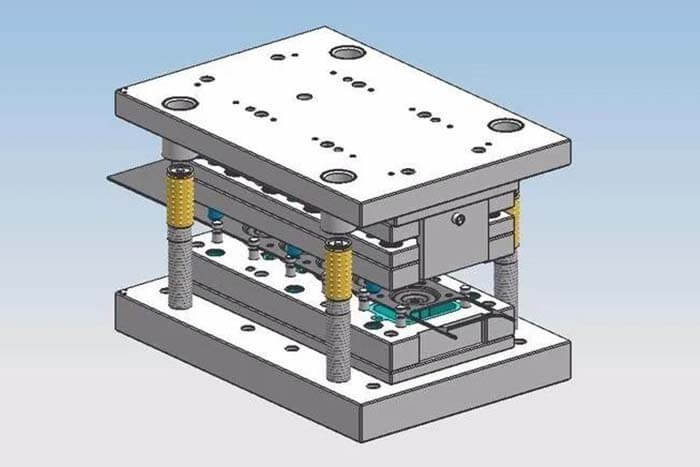
This article summarizes 30 die-stamping problems and troubleshooting for your reference.
Die-Stamping Problems And Troubleshooting 1. The convex die wears too fast
(1) The clearance of the die is small, generally, the total clearance of die stamping mold is 20%, 25% of the material plate thickness.
(2) Bad alignment of the convex and concave die, including the mold seat and mold guiding components and turret inserts are not accurate enough and other reasons cause bad alignment of the mold to the scarf parts.
(3) The temperature of the convex die is too high, mainly due to the overheating of the punch caused by the same die stamping for a long time.
(4) Improper die stamping sharpening method, resulting in annealing of the die stamping mold and increased wear.
(5) Local one-sided punching, such as step punching, punching angle, or shearing, the lateral force of aluminum alloy door and window parts will make the punch deviate to one side and the clearance of that side will be reduced, causing serious die wear. If the machine tool die stamping is not installed with high precision, it will seriously make the punch deviate over the upper die, causing damage to the convex die and concave die stamping mold.
Die-Stamping Problems And Troubleshooting 2. Die stamping with material problems die with the material will cause scrap rebound
(1) The sharpness of the die edge, the larger the rounded angle of the edge, the easier it is to cause a scrap rebound.
(2)The amount of mold entry, amount of mold entry for each upper bit of the machine tool is certain, the mold is small, and easily causes scrap rebound.
(3) The clearance of the mold is reasonable, if the mold gap is not appropriate, easy to cause the scrap to rebound.
(4) Whether there is more oil on the surface of the processed plate.
(5) Spring fatigue damage.
The solution is to prevent mold with the material.
(1) Use a special anti-banding concave die.
(2) Keep the die sharpened and demagnetized frequently.
(3) Increase the clearance of the concave die stamping mold.
(4) Use oblique edge n die instead of flat edge die stamping mold.
(5) Install rewinders in the mold.
(6) Reasonably increase the mold entry volume.
(7) Check the fatigue strength of the mold spring or unloading sleeve.
Die-Stamping Problems And Troubleshooting 3. Neutral problem die stamping mold
Die stamping mold in use is prone to different amounts of wear on each side position of the punch core, some parts have larger scratches and wear faster, this situation is pronounced on the thin and narrow rectangular die stamping mold. The main causes of the problem are.
(1) Machine tool turret design or processing accuracy is not enough. The main is the upper and lower turntable Yun mold mounting seat alignment is not good.
(2) The design or accuracy of the mold can not meet the requirements.
(3) The precision of the guide bush of the die is not enough.
(4)The clearance of the mold is not suitable.
(5)The mold mount or mold guide bush is not well aligned due to the wear of long-term use.
To prevent inconsistent die stamping mold wear, it should be:
(1) Regularly use the alignment mandrel to check and adjust the alignment of the machine tool turret and mounting base.
(2) Timely replace the mold guide bush and choose a convex and concave mold with suitable clearance.
(3) Adopt full guiding range die stamping mold.
(4) Strengthen the responsibility of operators and find out the cause in time to avoid greater losses.
(5) Use special or forming molds to improve production efficiency, but the price of the foot forming molds is higher, usually 4-5 times that of ordinary molds.
To avoid mistakes, the following principles should be noted and followed.
(1) Make a direction check when the mold is installed to ensure that the mold convex and concave dies are installed in the same direction.
(2) Adjust the stamping depth of the die correctly according to the requirements, and each adjustment should preferably not exceed 0.15mm.
(3) Use a lower punching speed.
(4) The plate should be flat without deformation or warping.
(5) The forming process should be placed as far away from the clamps as possible.
(6) Avoid downward-forming operations when using forming die stamping.
(7) Die stamping should be done in accordance with the common die stamping first and the forming die should be used last.
Die-Stamping Problems And Troubleshooting 5. Scrap jumping hole
(1) If The punch length is not enough, replace the punch according to the punch edge cutting into the concave die stamping with a material thickness plus 1mm.
(2) The clearance of the concave die is too large, cut into the sub to reduce the clearance or reduce the clearance with the phi machine.
(3) Punch or template is not demagnetized, use a demagnetizer to demagnetize the punch or template.
Die-Stamping Problems And Troubleshooting 6. Scrap plugging hole
(1) The drop hole is small or the drop hole is offset to increase the drop hole so that the drop material is smooth.
(2) The drop hole chamfer, increases the drop hole to remove the chamfer.
(3) Knife plus not put taper, line cutting taper, or reverse the expansion of the hole to reduce the length of the straight wall bit.
(4) The straight wall of the knife is too long, reverse drilling so that the straight wall of the knife is shortened.
(5) Edge collapse, resulting in a large phi, blocking material from re-grind the edge.
Die-Stamping Problems And Troubleshooting 7. Burrs
(1) Edge collapse, resulting in too large phi to regrind the edge.
(2) Punch and concave die clearance are too large, line cutting into the block, and re-allocation of clearance.
(3) Poor finish of concave die cutter, polish cutter straight wall bit.
(4) The clearance between punch and concave die is too small, save the die again and match the clearance.
(5) If the top material force is too large, reverse pull out the phi front for spring, and reduce the top material force.
Die-Stamping Problems And Troubleshooting 8. The cutting edge is not flush
(1) Positioning offset adjustment positioning.
(2) There is a single side of the molding, pull the material to increase the pressure force, and adjust the positioning.
(3) Design errors, resulting in uneven knife jointing re-line cutting edge cutter set the block
(4) Feeding is not allowed to adjust the feeder.
(5) feeding step calculation error recalculate the step, re-determine the joint knife position.
Die-Stamping Problems And Troubleshooting 9. Punch easy to break
(1) The closing height is too low, and the punch cut into the knife part is too long adjust the closing height.
(2) Improper positioning of material, causing the punch to cut a single side, adjust the positioning or feeding device due to uneven force fracture.
(3) The lower die waste blocks the cutter, causing the punch to break and re-drill the large drop hole to make the drop material smoothly.
(4) The fixed part of the punch (clamping plate) and the guiding part are repaired or re-cut into the block to make the punch go up and down smoothly (hitting plate) offset.
(5) Poor guidance of the punching plate, resulting in unilateral stress on the punch and re-matching the gap of the punching plate.
(6) The punch mouth is too short, and the punching board interferes with the replacement of the punch, increasing the length of the knife mouth part.
(7) If The punch is not fixed well, up and down re-fix the punch so that it cannot tamper up and down.
(8) The punch mouth is not sharp, re-grind the edge.
(9) The punch surface is strained and the force is uneven when taking off the material.
(10) The punch is too thin, too long, and not strong enough to change the punch type.
(11) The punch hardness is too high, and the punch material is not correct change the punch material, and adjust the heat treatment hardness.
Die-Stamping Problems And Troubleshooting 10. Iron filings
(1) Pressure bar misalignment recalculates the position of the pressure bar or bending position
(2) The bending gap is too small, and the extrusion of iron chips to readjust the gap, or grinding forming block, or grinding forming punch.
(3) Bending convex die is too sharp to repair the R angle.
(4) Too little material to connect the knife mouth to re-connect the knife mouth.
(5) The pressure bar is a too-narrow re-grind pressure bar.
Die-Stamping Problems And Troubleshooting 11. Poor budding
(1) The center of the bottom hole of the sprouting and the center of the sprouting punch do not coincide to determine the correct center position, move the position of the sprouting punch, or move into sprouting – side high – side low or even rupture the position of the pre-punching hole, or adjust the positioning.
(2) Uneven gap of concave die, resulting in pumping bud–side high-side – side repair with low pumping gap or even rupture.
(3) The bottom hole of the sprouting does not meet the requirements, resulting in the height of the sprouting and recalculation of the bottom hole aperture, increasing or reducing the diameter deviation of the pre-punched hole, or even rupture.
Die-Stamping Problems And Troubleshooting 12. Poor die-stamping molding
(1) Forming die convex die is too sharp, resulting in material pulling and cracking forming convex die repair R angle, appropriate repair R angle at the knife mouth.
(2) Forming punch length is not enough, failing to form the correct length of the calculated punch to adjust the actual length of the punch to achieve the requirements of the shape.
(3) The forming punch is too long, and the material at the forming area is deformed by pressure.
(4) Insufficient material at the forming place causes pulling and cracking of the material, repairing the R angle, or reducing the forming height.
(5) Bad positioning, causing bad forming adjust the positioning or feeding device.
(6) The forming gap is too small to cause a pulling or deformation deployment gap.
Die-Stamping Problems And Troubleshooting 13. Bending size
(1) The mold is not adjusted in place to cause angular error resulting in size bias adjustment of the closing height being poor or poor angle difference.
(2) The elasticity is not enough to cause a bad angle resulting in size deviation for the spring.
(3) Material does not meet the requirements of the angle caused by bad size leading to size change material or readjusting the gap deviation.
(4) Material thickness deviation caused by bad angle leads to size deviation to determine the material thickness, change the material, or re-adjust the gap difference.
(5) Improper positioning leads to size deviation adjust positioning to make the size OK.
(6) Design or processing errors caused by bending the public block between the patch welding grinding, eliminating the gap between the block, resulting in a small bending size.
(7) Forming male no R angle, in the angle and other normal conditions forming male repair R angle under the bending height is small.
(8) Both sides of the bending size are large plus the pressure bar.
(9) single-sided bending pull material caused by dimensional instability increases spring force, adjusting the positioning.
(10) Unreasonable gap, causing bad angles and size deviation repair gap.
(11) Bending knife height is not enough, the bending punch into the bending knife is too short to increase the height of the bending knife so that the bending punch as far as possible into the bending knife force bit caused by bad angles.
(12) Bending speed is too fast, resulting in bending root deformation adjustment speed ratio control, choose a reasonable speed.
(13) Unreasonable structure, the bending knife is not set into the fixed template, re-milling groove, the bending knife set into the template stamping, resulting in a larger gap.
(14) Forming male heat treatment hardness is not enough, resulting in pressure line collapse or re-molded male pressure line flattening.
Die-Stamping Problems And Troubleshooting 14. No unloading
(1) Improper positioning or improper feeding to adjust the positioning or feeding device.
(2) Not enough to avoid the position to repair the avoidance position.
(3) The inner guide column is strained, resulting in the poor activity of the playing board replacing the inner guide column.
(4) If the Punch strains or the surface is not smooth replace the punch.
(5) The material pin is not reasonable to reposition the top material pin position.
(6) If The top material force is not enough, or the stripping force is not enough replace the top material spring or stripping spring.
(7) The punch and cleat plate do not fit smoothly with the plate to repair the plate and cleat plate to make the punch fit smoothly.
(8) If the Forming slider does not fit smoothly, repair the slider and guide slot to make it fit smoothly.
(9) The heat treatment of the punching plate is not suitable, and the punching plate is deformed after a while, to correct the deformation.
(10) The punch is too long or the length of the top material pin is not enough. Increase the length of the top material pin or replace it with a suitable length punch.
(11) Punch is broken, replace the punch.
(12) The template is not clouded with magnetism, the workpiece is brought up to the template to demagnetize.
Die-Stamping Problems And Troubleshooting 15. Feeding is not smooth
(1) The die stamping is not set up correctly, resulting in the material belt and feeder and die stamping re-setting the die mold or adjusting the feeder is not in the same straight line.
(2) The material belt is not flat adjust the leveling machine or replace the material
(3) Not unloading the material causes the feeding to be not smooth refers to not unloading the material to solve the countermeasures.
(4) If The positioning is too tight adjust the positioning.
(5) If The guide pin is too tight or the straight wall is too long adjust the guide pin.
(6) If The punch is not fixed well or is too long to interfere with the material belt, change the length of the appropriate punch and fix it again.
(7) The top material pin is too short, and the material belt interferes with the forming block adjust the top material pin length to avoid interference
(8) The floating block position is not properly arranged to adjust the floating block position.
Die-Stamping Problems And Troubleshooting 16. Riveting bad
(1) The height of the mold closure is not appropriate riveting is not in place adjust the height of the closure.
(2) The workpiece is not put into position, positioning deviation adjustment positioning.
(3) The workpiece is not good before riveting to confirm the bud hole, refer to the bad bud hole to solve the countermeasures to confirm whether the riveting hole is chamfered, such as no chamfer to increase the chamfer.
(4) If The length of the riveting punch is not long enough, use a suitable length punch.
(5) The riveting punch does not meet the requirements. Confirm and use the riveting punch that meets the requirements.
Die-Stamping Problems And Troubleshooting 17. Missing or wrong installing
(1) Carelessly assembling the wrong punch.
(2) Punch without directional markings and directional punches are marked.
Die-Stamping Problems And Troubleshooting 18. Installing the wrong screw
(1) Do not know the thickness of the template to understand the thickness of the template is too long or too short.
(2) Not careful enough, not enough experience to choose the appropriate screws.
Die-Stamping Problems And Troubleshooting 19. Disassemble the die-stamping mold
(1) Pinhole is not clean pinhole, pin clean when dismantling the mold should first remove the positioning pin is easy to damage when installing the mold, should first use the screw guide, after playing the positioning pinhole
(2) The assembly and disassembly of the mold program are not correct when playing down the pin do not touch the pinhole.
Die-Stamping Problems And Troubleshooting 20. Positioning pins
(1) Hole wall hair pulling, scratching resulting in too tight group mold, carefully check whether the pinhole hair pulling, otherwise, should not hit the pinhole reaming.
(2) Pinhole offset or no escape hole below the additional positioning pin escape hole.
Die-Stamping Problems And Troubleshooting 21. Die-stamping mold spring is too long
(1) did not pay attention to the depth of the spring hole to measure the depth of the spring hole, calculate the compression amount of the spring, re-election can not be pressed down to
(2) Not careful enough, inexperienced appropriate spring under the dead point.
Die-Stamping Problems And Troubleshooting 22. Notes on the use of special forming tools
(1) The stroke of the slider is different for different types of machines, so pay attention to the adjustment of the closing height of the molding tool.
(2) It must be ensured that the molding is adequate, so it needs to be adjusted carefully, and the adjustment amount should preferably not exceed 0.15mm each time, if the adjustment amount is too large, it will easily cause damage to the machine and damage to the mold.
(3) For stretch forming, please use a light spring assembly to prevent the tearing of sheet material or difficulty in unloading due to uneven deformation, etc.
(4) Install ball-type support mold around the forming mold to prevent the sheet from tilting.
(5) The forming position should be as far away from the clamping jaws as possible.
(6) Forming process is best to be realized at the end of the processing procedure.
(7) Be sure to ensure good lubrication of the sheet.
(8) When ordering, please pay attention to the problem of giving way to special forming tools. If the two forms are close to each other, please make sure to communicate with our salesman.
(9) Because the forming tool needs a long unloading time, the forming process must be done at a low speed, preferably with a time delay.
Die-Stamping Problems And Troubleshooting 23. Unloading difficulties
(1) Use punches with fine-core rubber particles.
(2) Increase the lower die clearance.
(3) Check the fatigue level of the spring.
(4) Use heavy-duty dies.
(5) Appropriate use of beveled edge dies.
(6) Lubricate the plate.
(7) Large workstation die stamping needs to install a polyurethane discharge head.
Die-Stamping Problems And Troubleshooting 25. The main reasons for scrap bounce
(1) The sharpness of the cutting edge. The larger the rounded angle of the edge, the more likely to cause the scrap to bounce.
(2) The amount of mold entry. For each station die stamping, the requirement of the amount of die stamping entry is certain, the small amount of die stamping entry is easy to cause scrap rebound.
(3) Whether the clearance of the die is reasonable. Unreasonable die clearance is easy to cause scrap rebound.
(4) Whether there is oil on the surface of the sheet being processed.
Die-Stamping Problems And Troubleshooting 26. How to improve the service life of the die-stamping mold?
To the user, improving the service life of the die stamping can greatly reduce the stamping cost. The factors affecting the service life of the die stamping are as follows.
(1) The type and thickness of the material.
(2) Whether to choose a reasonable lower die clearance.
(3) The structure form of the die.
(4) Whether the material is well lubricated when stamping.
(5) Whether the die is treated with a special surface treatment.
(6) Such as titanium plating, and titanium carbide nitride.
(7) The alignment of the upper and lower turret.
(8) The proper use of adjusting shims.
(9) The proper use of beveled edge dies.
(10) Whether the machine tool die holder is worn out.
Die-Stamping Problems And Troubleshooting 27. How to prevent the material from twisting?
If you need to punch many holes in a plate and the plate does not stay flat, the cause may be the accumulation of punching stress. When a hole is punched, the material around the hole is stretched downward, increasing the tensile stress on the upper surface of the plate.
The downward punching motion also causes an increase in compressive stress on the lower surface of the sheet. For a small number of holes, the result is not obvious.
Still, as the number of holes punched increases, the tensile and compressive stresses increase exponentially until the sheet is deformed.
One way to eliminate this distortion is to punch every other hole and then return to punch the remaining holes.
This produces the same stresses in the sheet but dissipates the tensile/compressive stresses that accumulate as a result of punching one after the other in the same direction. This also allows the first batch of holes to share the partial deformation effect of the second batch of holes.
Die-Stamping Problems And Troubleshooting 28. How can I punch a hole without exceeding the nominal force of the machine?
The production process requires the punching of round holes larger than 114.3 mm in diameter.
Such large holes can exceed the upper nominal force limit of the machine, especially for high-shear strength materials. This problem can be solved by punching the large size holes by multiple punching. Using a smaller size die to shear along a larger circumference can reduce the punching force by half or more, and probably most of the dies you already have can do this.
Die-Stamping Problems And Troubleshooting 29. Tooling Overhaul
If the punch is bitten by the material and cannot be taken out, check the items as noted below.
(1) Re-sharpening of punch and lower die. A die with a sharp edge can process a beautiful cutting surface. A blunt edge requires extra punching pressure and a rough section of the workpiece produces great resistance, causing the punch to be bitten by the material.
(2) The clearance of the die. If the clearance of the die is not selected properly relative to the plate thickness, the punch requires a large release force when disengaging the material. If this is the reason for the punch being bitten by the material, please replace the lower die with reasonable clearance.
(3) The condition of the processed material. If the material is dirty, or there is dirt, the dirt adheres to the die and makes the punch bite the material and cannot be processed.
(4) Material with warpage. Warped material clamps the punch after punching and makes the punch bite. For warped material, please make it flat and then process it.
(5) Overuse of spring. The spring may become fatigued. Please check the performance of the spring from time to time.
Die-Stamping Problems And Troubleshooting 30. Selection of die clearance
The clearance of the die is related to the type and thickness of the material to be stamped. Unreasonable clearance can cause the following problems.
(1) If the clearance is too large, the burr of the stamped workpiece is larger and the stamping quality is poor. If the clearance is small, although the quality of the punched hole is better, the wear of the die is more serious, which greatly reduces the service life of the die, and it is easy to cause the breakage of the punch.
(2) Too large or too small a gap is likely to produce adhesion on the punch material, thus causing strip material during punching. Too small a gap is likely to form a vacuum between the bottom surface of the punch and the plate material and cause scrap bounce.
(3) A reasonable clearance can prolong the life of the die stamping mold, unload the material, reduce burrs and flanges, keep the plate clean and consistent without scratching the plate, reduce the number of sharpening, keep the plate straight, and position the punch accurately.
Besides the 30-Die Stamping Problems And Troubleshooting article, you may also be interested in the below articles.
Summary Of 50 Injection Mold Structure Operation Dynamic Diagrams
Auto Parts Stamping Die Design Concept
