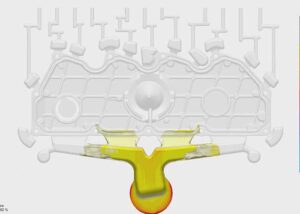
After reading this 16 Knowledge collection of injection molding basics, you will learn the 16 listed knowledge collection of injection molding basics.
Injection molding basics 1. Pre-injection molding action selection
According to the pre-molding charging before and after the injection seat back, that is, whether the nozzle leaves the mold, the injection molding machine generally has three options.
(1) Fixed charging
Before and after pre-molding, the nozzle always sticks into the mold, and the injection seat does not move.
(2) Pre-feeding
The nozzle is pressed against the mold for pre-molding, and when the pre-molding is finished, the nozzle leaves the mold when the injection base is backed up.
The purpose of choosing this method is: to use the injection hole of the mold to help the nozzle when pre-molding, to avoid the melt from the nozzle when the backpressure is high, and to avoid the heat transfer between the nozzle and the mold after pre-molding for a long time, which affects the relative stability of their respective temperatures.
(3) Post-filling
After the injection is completed, the injection seat is backed up, the nozzle leaves the mold and then pre-molded, ready to finish injection molding, and then the injection seat is forward. This action is suitable for processing plastics with particularly narrow molding temperatures.
Due to the short contact time between the nozzle and the mold, it avoids the loss of heat and the solidification of molten material in the nozzle hole.
The pre-molding action starts after the injection is finished and the cooling timer has timed out. The screw rotates to melt and extrude the plastic to the front of the screw head.
The molten plastic accumulates at the front end of the barrel and forces the screw backward due to the one-way valve acted by the check ring at the front of the screw.
When the screw retreats to a predetermined position (this position is determined by a travel switch, which controls the distance the screw retreats to achieve quantitative feeding), the pre-melting stops and the screw stops rotating.
This action can release the pressure of the melt gathered at the nozzle and overcome the “saliva” phenomenon caused by the imbalance of pressure inside and outside the barrel.
If you don’t need to reverse the shrinkage, you should set the shrinkage stop switch to the appropriate position so that the shrinkage stop switch is also pressed at the same time as the pre-molding stop switch is pressed.
When the screw is retracted to the stop switch, the retraction stops. Then the injection base starts to retreat. When the injection seat recedes to the press-up stop switch, the injection seat stops receding. If the fixed feeding method is used, the position of the travel switch should be adjusted.
The general production of a more fixed feeding method to save the injection seat into the back operation time, to speed up the production cycle.
Injection molding basics 2. Injection pressure selection
The injection pressure of the injection molding machine is regulated by the regulator. Under the condition of the regulated pressure, the high and low-pressure oil circuit is opened and closed to control the high and low injection pressure before and after the injection.
There are three kinds of pressure options for injection molding machines of medium size or above, namely high pressure, low pressure, and high pressure followed by low pressure. The high-pressure injection is achieved by passing high-pressure oil into the injection cylinder.
Due to the high pressure, the plastic enters the mold cavity at high pressure and high speed from the beginning. In high-pressure injection, the plastic enters the mold quickly and the pressure gauge reading of the injection cylinder rises quickly.
The low-pressure injection is achieved by injecting low-pressure oil into the injection cylinder, and the pressure gauge reading rises slowly during the injection process, and the plastic enters the mold cavity at low pressure and speed.
The high pressure first and then low pressure is achieved by controlling the pressure of the oil into the cylinder from time to time according to the plastic type and the actual requirements of the mold.
To meet the requirements of different plastics with different injection pressure, you can also use the method of replacing different diameter screws or plungers, to meet the injection pressure and give full play to the production capacity of the machine.
Large injection molding machines often have multi-stage injection pressure and multi-stage injection speed control functions, so as to better ensure the quality and accuracy of the products.
Injection molding basics 3. Selection of injection speed
Generally, there is a fast-slow speed knob on the control board of the injection molding machine to meet the requirements of injection speed. In the hydraulic system, there is a high-flow oil pump and a low-flow pump operating simultaneously to supply oil.
When the oil circuit is connected to the high flow, the injection molding machine can realize fast mold opening and closing, fast injection, etc. When the hydraulic oil circuit only provides low flow, the injection molding machine will carry out various actions slowly.
Injection molding basics 4. Selection of ejector form
Injection molding machine ejection form of mechanical ejection and hydraulic ejection two, some are also equipped with a pneumatic ejector system, the number of ejections with single and multiple kinds two. Ejecting action can be manual, but also automatic.
The ejecting action is activated by the opening stop limit switch. The operator can adjust the eject time button on the control cabinet to achieve it as needed.
The ejector speed and pressure can also be controlled by the switch on the control cabinet, and the distance before and after the ejector pin movement is determined by the travel switch.
Injection molding basics 5. Temperature control
Temperature measuring thermocouple as the temperature measuring element, with temperature measuring millivoltmeter to become a temperature control device, commanding the barrel and mold electric heater current on and off, selectively fixed barrel section temperature and mold temperature.
The barrel electric heating circle is generally divided into two, three, or four sections of control. The ammeter on the electrical cabinet shows the magnitude of the current of each section of the electric heater.
The reading of the ammeter is relatively fixed if the ammeter reading is found to be low for a long time in operation.
It is possible that the electric heating circle has malfunctioned, or the wire contact is bad, or the electric heating wire is oxidized and thin, or a certain electric heating circle is burned, which will make the circuit parallel resistance value increase and make the current drop.
In the ammeter has a certain reading can also simply use the plastic strips one by one in the outer wall of the electric heating circle smear, and see the material strip melt or not to determine whether an electric heating circle is energized or burned.
Injection molding basics 6. Mould closing control
Mold closing is to close the mold with a huge mechanical thrust to resist the high-pressure injection of molten plastic and the huge opening force of the mold caused by filling the mold.
When the safety gate is closed, all the travel switches give a signal and the mold-closing action starts immediately.
Firstly, the moving plate starts at a slow speed, and after a short distance, the lever pressure block, which was holding the slow speed switch, is disengaged and the moving plate is turned to advance rapidly.
When advancing to near the end of the die closing, the other end of the lever presses on the slow speed switch again, then the movable plate turns to slow speed and advances with low pressure.
In the process of low-pressure mold closing, if there is no obstacle between the molds, they can be closed smoothly until the high-pressure switch is pressed, and the high-pressure is turned in order to straighten the machine hinge to complete the closing action.
This distance is extremely short, generally only 0.3~1.0mm, just after the high-pressure rotation, it touches the mold closing end limit switch, then the action stops and the mold closing process is finished.
There are fully hydraulic type and mechanical linkage types of mold closing structures of injection molding machines. Regardless of the type of structure, the closing force is finally applied by fully straightening the connecting rod.
The straightening process of the connecting rod is the process of the movable plate and the tail plate being held apart, and the process of the four tie rods being stretched by the force.
The magnitude of the clamping force can be known from the highest value of the hydraulic gauge at the moment of closing the mold.
Smaller injection molding machines do not come with a mold-closing oil pressure gauge, so it is necessary to judge whether the mold is tight according to the straightening of the connecting rod.
If the connecting rod is easily straightened when the mold is closed, or if it is not straightened by a little bit, or if one of the several pairs of connecting rods is not fully straightened, the mold will be swollen and the parts will have flying edges or other problems.
Injection molding basics 7. Mold opening control
After the molten plastic is injected into the mold cavity and cooled, the mold is opened and the product is removed. The mold opening process is also divided into three stages.
The first stage of slow mold opening to prevent the parts from tearing in the mold cavity.
The second stage is fast to shorten the mold opening time.
The third stage of slow mold opening is to reduce the impact and vibration caused by mold opening inertia.
Injection molding basics 8. Control of injection molding process conditions
At present, various injection molding machine manufacturers have developed a variety of program control methods, including injection speed control, injection pressure control, injection into the mold cavity plastic filling control, screw backpressure, and speed control of the plastic refining state.
The purpose of process control is to improve the quality of products and maximize the performance of the machine.
Injection molding basics 9. Program control of injection speed
The program control of injection speed is to divide the injection stroke of the screw into 3~4 stages and use the appropriate injection speed in each stage respectively.
For example, the injection speed is slowed down when the molten plastic first passes through the gate, high speed is used during the mold filling process and slowed down at the end of the mold filling. This approach prevents overflow, eliminates flow marks, and reduces residual stress in the product.
When the mold is filled at la ow speed, the flow rate is smooth, the size of the product is stable and fluctuates less, the stress inside the product is low, and the stress inside and outside the product tends to be the same.
For example, when a polycarbonate part is immersed in carbon tetrachloride, the part injected at high speed has the tendency to crack, while the one at low speed does not crack.
Under the slower mold filling conditions, the temperature difference of the material flow, especially the temperature difference of the material before and after the gate, helps to avoid the occurrence of shrinkage and depression.
However, due to the long mold filling time, it is easy to make the parts appear layered and poorly bonded fusion marks, which not only affect the appearance but also greatly reduce the mechanical strength.
When high-speed injection, the material flow speed is fast, when the high-speed mold fills smoothly, the molten material is quickly filled with a cavity, the material temperature drops less, the viscosity also drops less, you can use a lower injection pressure, which is a hot material filling situation.
High-speed mold filling can improve the gloss and smoothness of the parts, eliminate the phenomenon of the seam line and delamination, small shrinkage depression, and uniform color, and ensure the fullness of the larger part of the parts.
However, it is easy to produce fat and blistered products or yellow parts, or even burn and scorch, or cause difficulties in demolding, or uneven filling of the mold. For high-viscosity plastics, it may lead to melting rupture and cloudy spots on the surface of the parts.
How to control the Injection pressure program?
The control of injection pressure is usually divided into the control of primary injection pressure, secondary injection pressure (holding pressure), or more than three times of injection pressure.
The proper timing of pressure switching is very important to prevent excessive pressure in the mold and to prevent overflow or lack of material.
The specific volume of the molded product depends on the melt pressure and temperature when the gate is closed during the holding phase.
If the pressure and temperature are the same every time you switch from holding pressure to product cooling, the specific volume of the product will not change.
At a constant molding temperature, the most important parameter that determines the size of the product is the holding pressure, and the most important variables that affect the dimensional tolerance of the product are the holding pressure and temperature.
For example, the holding pressure is reduced immediately after the mold is filled and then increased when the surface layer forms a certain thickness so that large, thick-walled products can be molded with low clamping force, eliminating craters and flying edges.
The holding pressure and speed are usually 50%~65% of the highest pressure and speed when the plastic fills the mold cavity, i.e. the holding pressure is about 0.6~0.8MPa lower than the injection pressure.
Since the holding pressure is lower than the injection pressure, the load on the oil pump is low during the considerable holding time, and the service life of the solid oil pump is extended, while the power consumption of the oil pump motor is also reduced.
The pressure injection can make the parts fill the mold smoothly without fusion line, depression, flying edge, and warpage deformation.
It is good for the molding of thin-walled parts, small multi-headed parts, large parts with a long flow, and even the molding of parts with less balanced cavity configurations and less tightly molded parts.
Injection molding basics 10. Program control of plastic filling volume into the mold cavity
A certain amount of metering is adjusted in advance so that a small amount of melt remains at the end of the screw near the end of the injection stroke (buffer amount), and a small amount of melt is added by applying further injection pressure (secondary or tertiary injection pressure) according to the filling situation in the mold.
In this way, the product can be prevented from sinking or the shrinkage rate of the product can be adjusted.
Injection molding basics 11. Program control of screw back pressure and rotational speed
High backpressure can make the melt get a strong shear, and low rotational speed will make the plastic get a longer plasticizing time in the barrel. Therefore, back pressure and rotational speed are now more often programmed and controlled simultaneously.
For example, high speed and low back pressure at the full stroke of the screw metering, then switching to a slower speed and higher back pressure, then switching to high back pressure and low speed, and finally plasticizing at low back pressure and low speed, so that most of the pressure of the melt at the front of the screw is released and the rotational inertia of the screw is reduced, thus improving the accuracy of the screw metering.
Excessive back pressure often results in increased discoloration of the colorant.
Increased mechanical wear of the pre-molding mechanism combined with the barrel screw.
Extended pre-molding cycles and reduced production efficiency.
nozzles are prone to salivation and an increase in the amount of recycled material.
Even with self-locking nozzles, if the backpressure is higher than the designed spring blocking pressure, it will also cause fatigue damage.
Therefore, the backpressure must be adjusted properly.
With the advancement of technology, it has become possible to incorporate small computers into the control system of injection molding machines and use computers to control the injection molding process.
Injection molding basics 13. Pre-treatment of raw materials
According to the characteristics of the plastic and the supply of materials, generally in the molding of raw materials before the appearance and process performance should be tested.
If the plastic used is powder, such as polyvinyl chloride, should also be ingredients and dry mixing; if the product has coloring requirements, then you can add the appropriate amount of coloring agent or color masterbatch.
The supplied granules often contain different degrees of moisture, melts, and other volatile low molecular substances, especially some plastics with a tendency to absorb moisture always contain more water than the limit allowed for processing.
Therefore, they must be dried and the moisture content measured before processing. The moisture content of polycarbonate, which is sensitive to water at high temperatures, is required to be below 0.2% or even 0.03%~0.05%, so it is often dried in vacuum drying ovens.
The dried plastic must be properly sealed and preserved to prevent the plastic from reabsorbing moisture from the air and loss of drying effect, for this reason, the use of a dry room hopper can continuously provide dry hot material for the injection molding machine, to simplify operations, maintain cleanliness, improve quality, increase the injection rate are beneficial.
The loading capacity of the drying hopper is generally 2.5 times the hourly capacity of the injection molding machine.
Injection molding basics 14. Preheating the insert
For the assembly and strength of injection molded products, it is necessary to embed metal inserts in the products.
When injection molding, the cold metal insert placed in the mold cavity and the hot plastic melt together when cooling, due to the significant difference between the shrinkage rate of metal and plastic, often resulting in large internal stress around the insert (especially like polystyrene and other rigid chains of polymers more significant).
The presence of this internal stress causes cracks around the insert, resulting in a significant reduction in the performance of the product.
This can be achieved by using metals with a high coefficient of thermal expansion (aluminum, steel, etc.) as inserts and by preheating the inserts (especially large medal inserts). At the same time, the design of products in the insert around the arrangement of large thick walls and other measures.
Injection molding basics 15. Cleaning of the machine barrel
Before the newly purchased injection molding machine is used for the first time, or in the production needs to change the product, change the raw material, change the color, or find the decomposition of plastic, it is necessary to clean or disassemble the barrel of the injection molding machine.
The barrel cleaning method is generally used to clean the barrel by heating. The cleaning material is usually plastic raw material (or plastic recycling material).
For heat-sensitive plastics, such as polychlorinated ethylene stock, available low-density polyethylene, polystyrene, and other transitional cleaning materials, and then the new material is processed to replace the transitional cleaning material.
Injection molding basics 16. The choice of release agent
A mold release agent is a substance that can make plastic products easy to release.
Zinc stearate is suitable for general plastics except for polyamide.
Liquid paraffin wax is used for polyamide plastic with better effect.
Silicone oil is expensive and troublesome to use, so it is used less often.
The use of mold release agents should be controlled in the right amount, as little as possible, or not used. Spraying too much will affect the appearance of the product, and the color decoration of the product will also have a negative impact.
Besides The 16 Knowledge of Injection Molding Basics article, you may also be interested in the below articles.
Summary Of 50 Injection Mold Structure Operation Dynamic Diagrams
Auto Parts Stamping Die Design Concept
